Tips and techniques for using ENGO® blister prevention patches
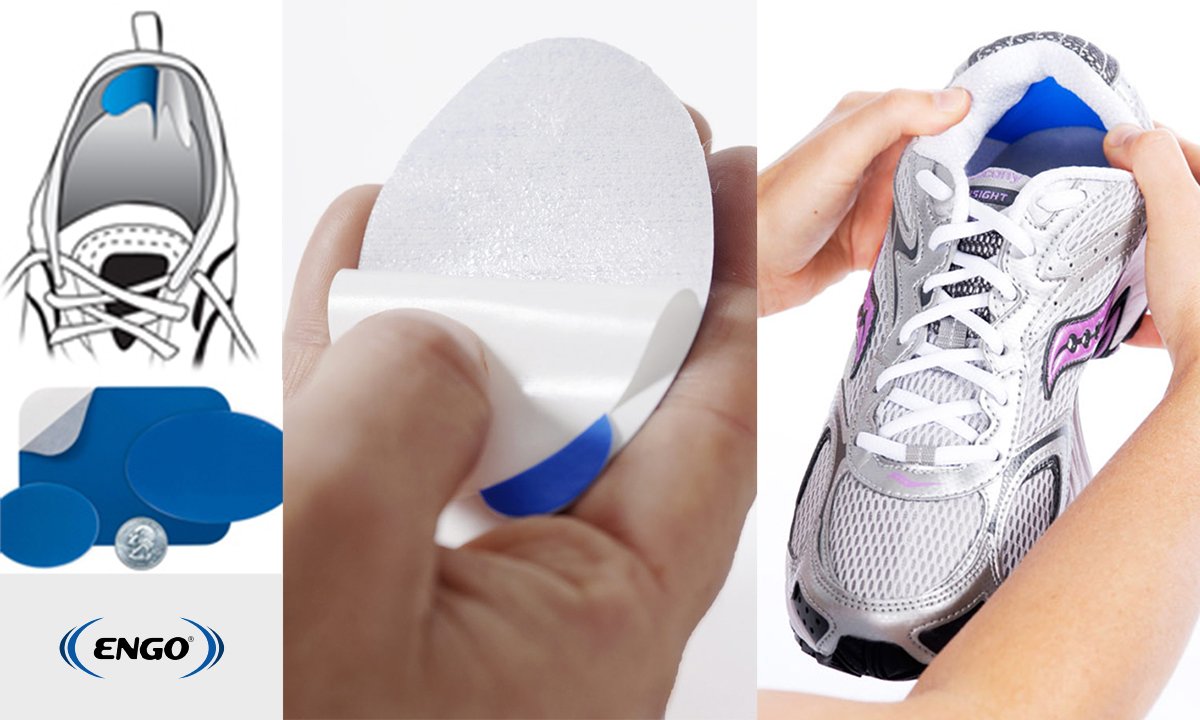
Application of ENGO blister patch.
For easier patch installation, remove ½ of the patch from the backing. Fold backing to create a tab. Use tab for handling patch. Once the patch is in the desired location, remove the remaining backing. Press to secure.
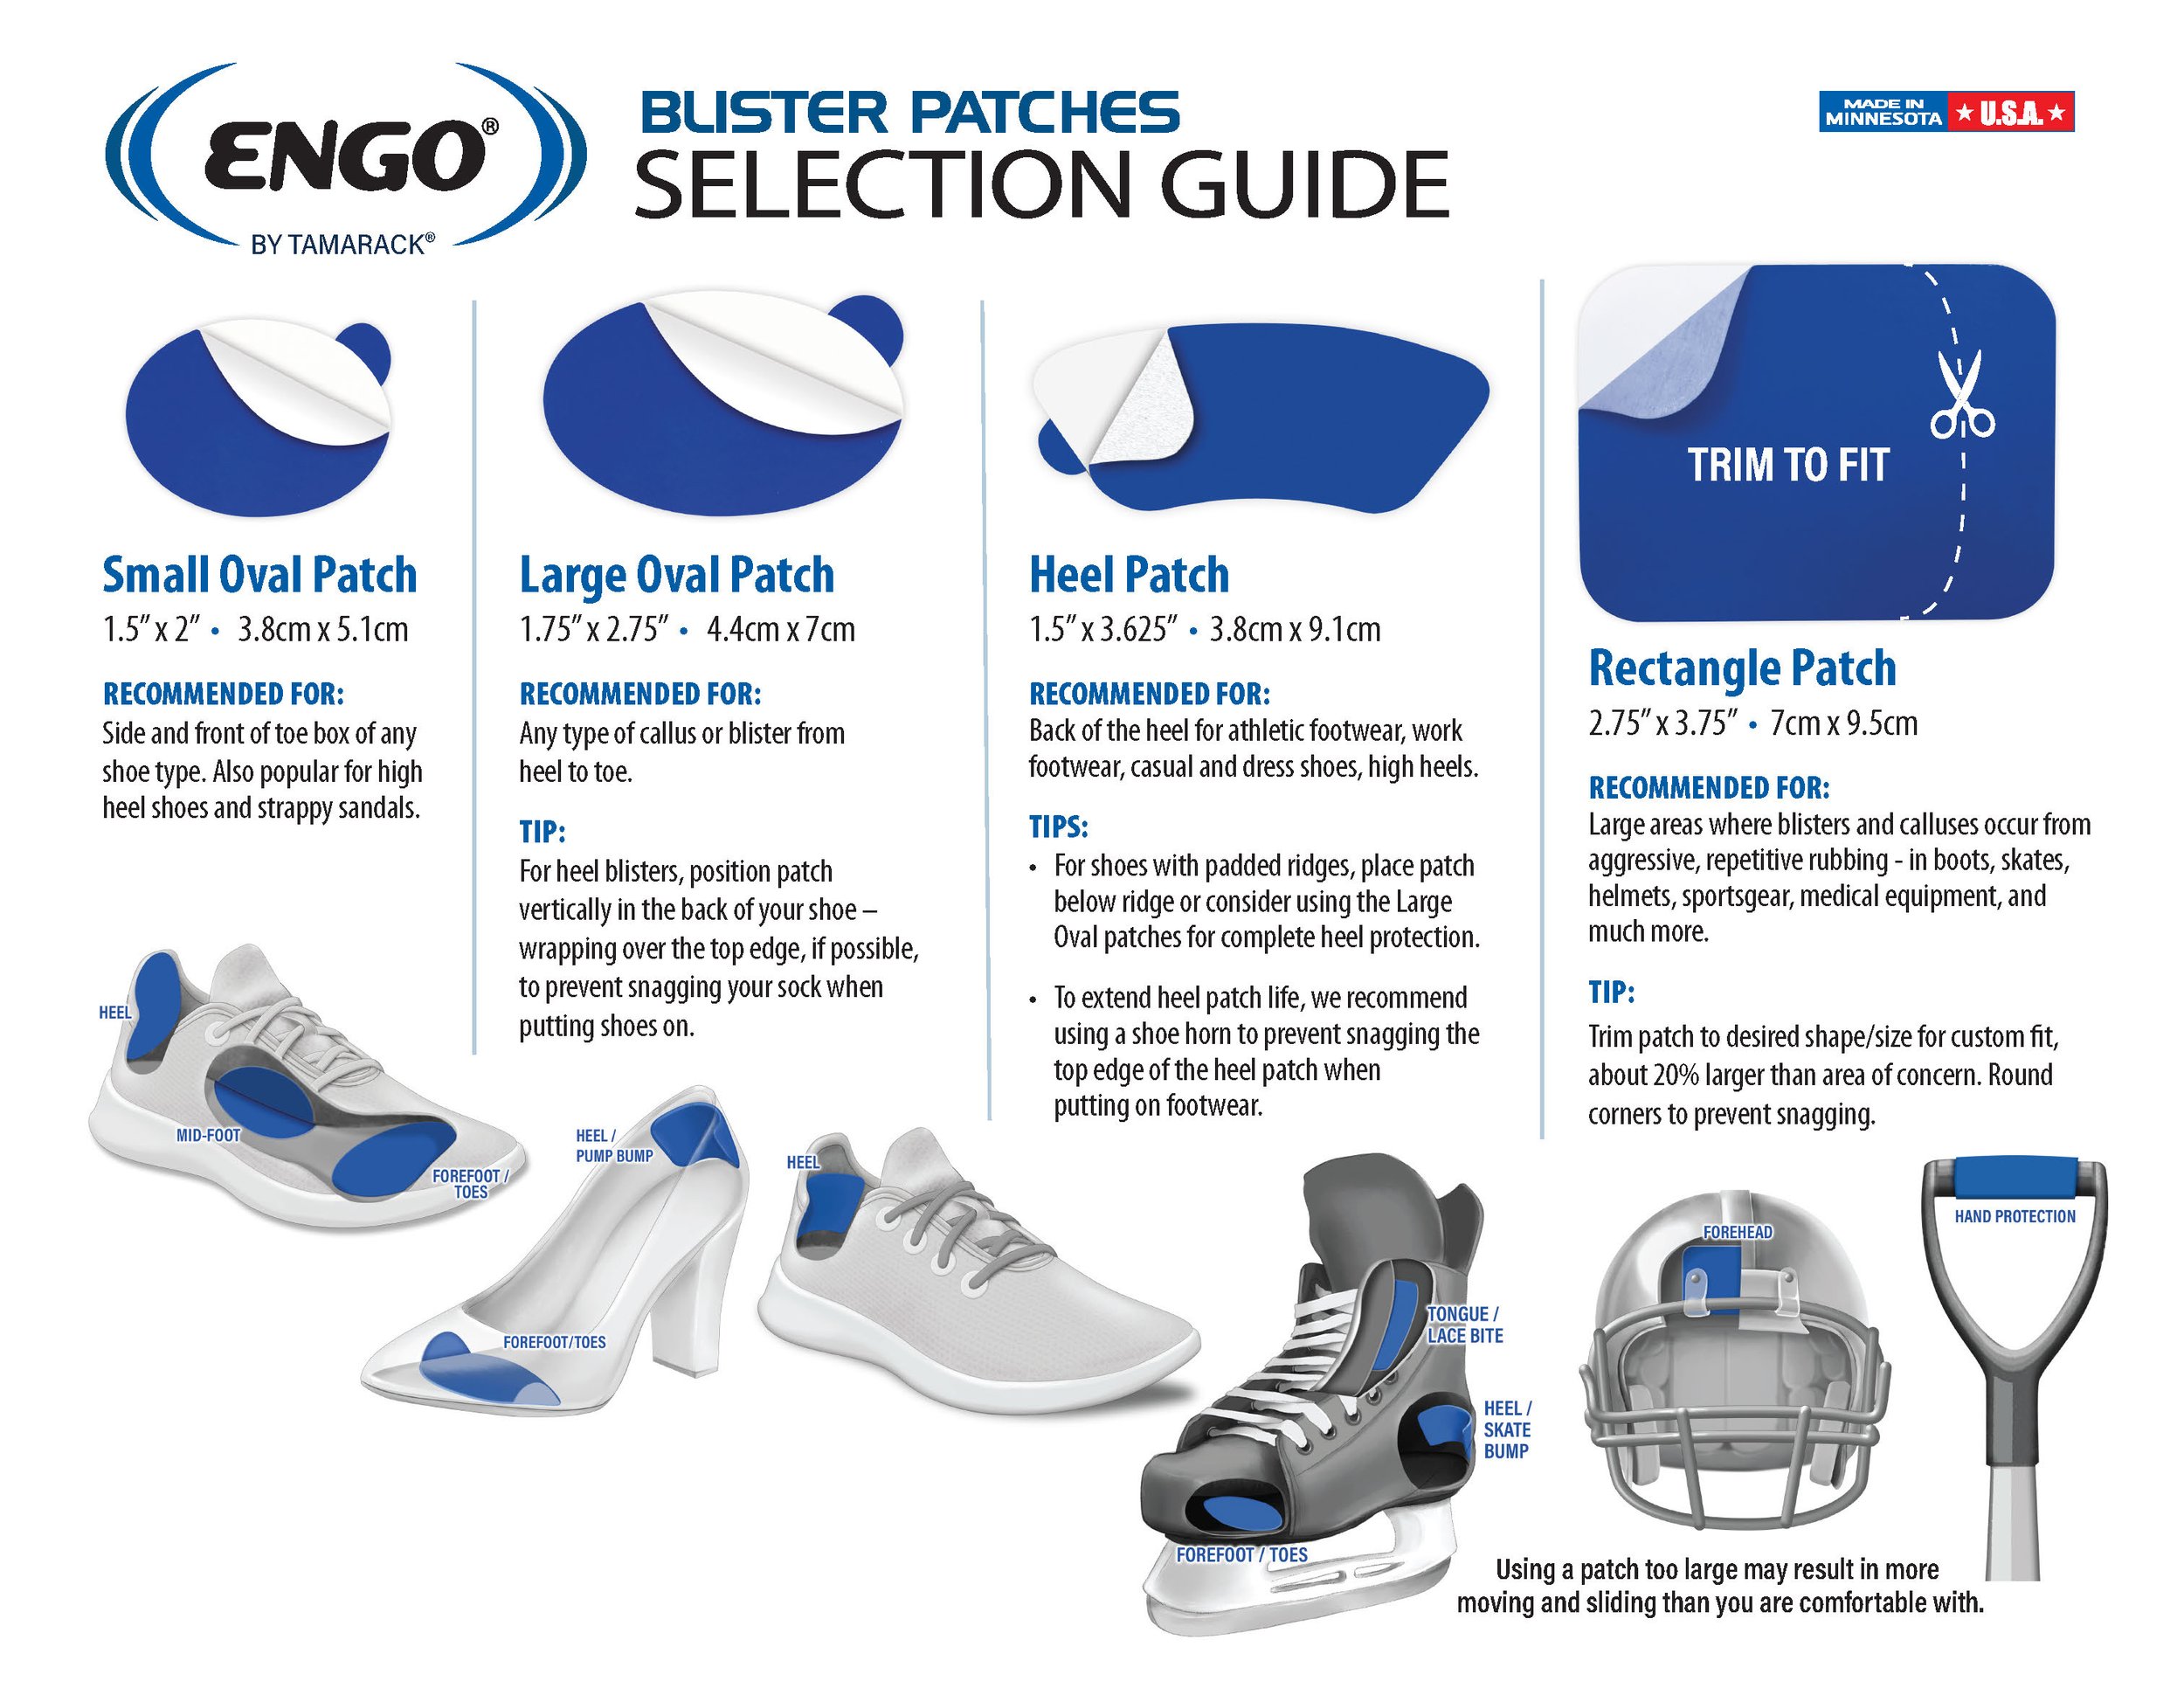
All ENGO patches can be custom-trimmed to desirable size & shape. We recommend rounding corners.
For easier removal of ENGO patches, use a hair dryer.
If blisters form at the interface of footwear & insole, use two patches. One patch is placed on the footwear. The other patch is placed on the insole. A smooth, blue interface is created.
ENGO will adhere best when applied to a dry surface. Apply patches prior to activities for best results. ENGO may last longer when anchored to a surface. For example, wrapping patches around the edge/sides of the insole.
Packaging, protection and Quality Assurance.
ENGO packaging was designed with your needs in mind. The re-closable, heavy-duty bag used to package ENGO protects patches from elements and preserves product quality. We recommend that you store unused patches in the bag. Some locations in footwear are hard to reach (i.e. toe box). To place ENGO in these locations, try this technique:
Remove ½ of the patch from the backing. Fold backing to create a tab. Place the patch in the desired location. Press to secure the tab. Remove the rest of the backing. Press to secure the entire patch. Or, simply place the patch on your sock.
Share your tips or techniques with us by email info@goengo.co.uk